Browsed by
Month: September 2007

New Tutorial on Cracked Text and Photos, New Splash for a Friend, Rescue Me and v5?

New Tutorial on Cracked Text and Photos, New Splash for a Friend, Rescue Me and v5?

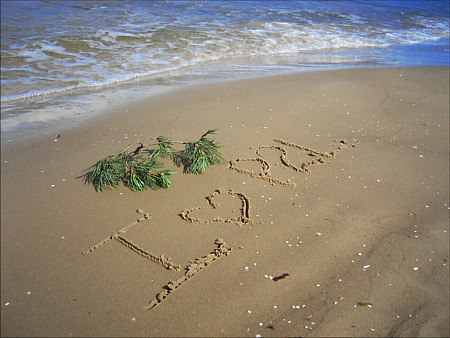
Hey guys! There’s been quite a bit of activity lately and I’ve been sort of dabbling in all kinds of spots… So here’s a quick round-up of what’s new, what I’ve been up to and all that jazz. First off, I want to show you a little splash page I made for a friend of mine. As some of you may know, I’m pretty heavy in to the Garage Kit community and one of my good friends and favorite artists in the community is Joe Dunaway, who is especially famous for his insanely awesome Predator model kit build-ups. Anyhow, I host a gallery page for him and he asked me to hook him up with a new front Splash page for him. Here’s what I came up with:

ModelZone Splash

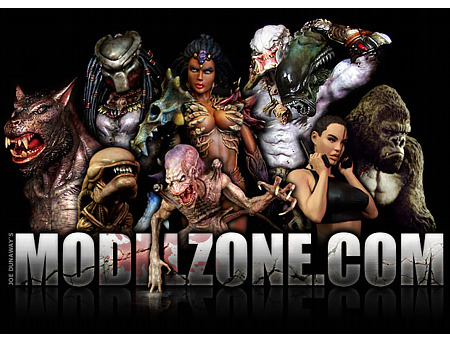
You can check out the full thing at www.modelzone.com

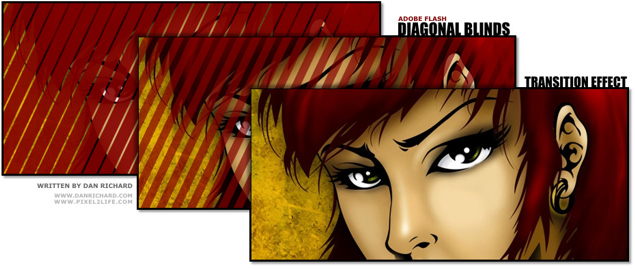
I really liked the way this came out, and I really liked the way the ripple effect on the reflection turned out, making the logo look like it’s sitting in water. Call me bias, but I thought this turned out really cool. So then I was puttering around thinking of a new tutorial to write when I thought maybe folks would like to know how I made that cracked text effect and the rippled reflection. You can apply that cracked effect to anything actually.. text, objects, photos etc. So, I decided to divide this up in to a 2-part tutorial, starting with how to create cracked text and objects in Corel Photopaint.

Cracked Text Tutorial

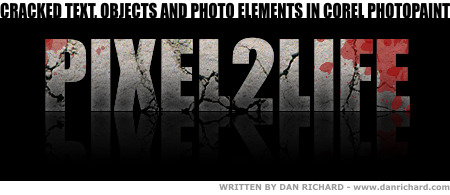
This tutorial is once again published on the Pixel2life Publishing System, and I invite you to come check out my latest lesson HERE! This tutorial covers how to apply cracks and other textures to a variety of surfaces in a technique that is as easy as pie!

In a couple of weeks I’ll also be posting the second part that shows how I made the ripple reflection part, so stay tuned for that.

It’s also been pretty busy for me because Halloween is fast approaching and one of my new services on Predatorstuff.com is my costume sales. I’ve teamed up with Kre8-FX and the talented Pete Mander to create the ultimate Predator costume and this is our first Halloween round and it’s been MADNESS! We’re actually shipping out the first suits next week and I am REALLY stoked at showing off the final pics. Here’s a photo of the upper torso of an AvP Predator costume we released a couple of weeks ago:

Predator Costume

If you want to see more about these suits we’re doing, check out the post on www.predatorstuff.com.

And you thought I only did tutorials? HAR!

And on an entertainment note, is anyone else out there completely obsessed with how kick-ass Rescue Me is? I’ve been a Dennis Leary fan for years and his Fireman TV series is absolutely his best work and one of the best television series I have EVER seen.

Rescue me

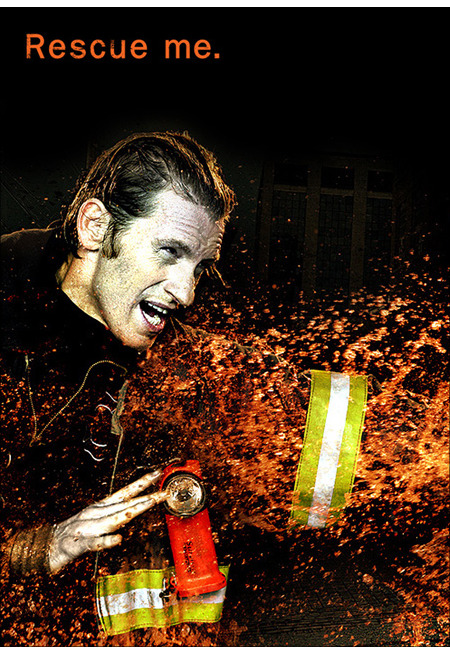
If you have no idea what I’m talking about, Rescue me is an edgy adult TV series about the lives of various FNDY firefighters post 9/11 and how badly their lives have turned since that tragic day. It’s EXTREMELY gritty and isn’t carried on regular stations, it’s only on speciality stations like Fox’s action showcase channel. There’s loads of swearing, sexual content and has quite often had me in tears from laughing so hard. The 4th season JUST wrapped up and you can find the first 3 series on DVD all over the place. I HIGHLY recommend you check out this show, it’s every bit as good as reviewers say it is. I personally think television SUCKS and 99% of TV shows are absolute garbage, especially reality shows and all that nonsense. There’s only a couple of series I enjoy, like Third Watch (sucks it’s over), Prison Break (although that’s starting to get tedious now), but Rescue Me is probably the best thing since MacGyver!

You can also check out their official website at www.fxnetwork.com for showtimes and details about the production and cast.

The other day some P2L community members were talking about various ideas to boost the forum participation up and one of them jokingly poked a jab saying maybe we should start talking about version 5 of P2L, even though we just released v4. Well, I didn’t say anything he’d be surprised how close he came to the mark, because I am indeed already mulling over ideas and concepts for the 5th version of the site. There’s nothing SOLID down yet, but one of the things we are looking at is the possibility of a complete redesign and leaving behind the look we’ve more or less carried around since v2. This would be one of the biggest things we’ve done on the site actually as a new layout can be a make-it-or-break-it move. I’ve already been working with Nick and 2 other professional design groups, which will remain unnamed for the time being, on some concept designs, but I haven’t decided on anything yet. I just figured that being the guy that has designed everything on the site for the last 4 years, maybe it’s time we had a fresh set of eyes look at a design and freshen things up completely.

So nothing concrete on this yet, but I thought I’d mention it here for the few of you that read my blog, let alone read enough of this post to make it to this point.

So that’s about it for me… very busy on all kinds of projects and trying to have some fun in between. Take care gang and we’ll see you next post!

Dan

Creating Cracked Rock Text, Faces, Orbs and other objects in Corel Photopaint!

Creating Cracked Rock Text, Faces, Orbs and other objects in Corel Photopaint!

Welcome to another Corel Photopaint tutorial by yours truly, and today we’re going to show you a VERY cool effect that is a breeze to pull off.  I’m going to show you how to apply a cracks to text, photos and other objects by using a simply texture and some layer blending.  This is easy as pie, but can be used to create some fairly complicated photo manipulations.  This is especially popular for people that like making those dark zombie style photo manipulation projects, but this is also great for creating rock text and other fun effects.

What you need to know

This is probably my 20th Photopaint tutorial, so I think the need to describe and illustrate each and every click is becoming a bit redundant don’t you think?  From now on I’ll gloss over items we’ve already discussed in great detail and dedicate the time on areas we haven’t explored together.  What I will do though, is mention what other tutorials you should know before-hand as the lessons taught on those tutorials are applicable to the current lesson.

In this tutorial, we’ll be adding some gradient style text effects with the Interactive Transparency Tool and creating a simple reflection effect, so if you’re not familiar with how to do this, please read my tutorial on creating the Sheen Text Effect. This tutorial covers these tricks in greater detail.

With that said, let’s get started!

Step 1: Our first step will be to open up Photopaint and create a new canvas with a black background.  I find the cracks stand out better on a black background, but nothing is stopping you from applying this to a white one either.  So let’s go with a black background and write out some dark grey text:

Step 2: Now go find yourself a nice photo of cracks!  NO not THAT kind of crack.. *shakes head*  This Kind!  Once you find a texture you want to work with, go ahead and paste it right over top of the text we created in Photopaint:

Here is the texture I used:

And here it is copied in to my project:

Step 3: And now we start the magic!  Change the object layer that contains the texture to Overlay and this will apply an overlay blending mode of this object layer to the object layer below it:

Ta-Da!

Now theoretically, you could save your text now and call it a day, but that’s more than a little boring, I think we need to jazz up this effect a bit more and make it grittier and just more interesting overall.  The first thing we need to do before we play is crop out the part of the texture image that we don’t need.

Step 4: Make sure you click on the text object layer on the object docker and hit Ctrl-M to generate a mask around the text:

Now click on the texture object layer and select the mask tool:

Now hit Ctrl-X (You’ll suddenly see your original grey text) and then Ctrl-V (and your cracks are back!).  You just did a cut and paste function…  At first it will appear that nothing has really changed:

But if you look at your Object Docker, you’ll see that crack text part is now in a new layer and is separate from the main texture image you started off with:

Now just click on the main texture object layer and delete it, you don’t need it anymore:

WARNING: At this point, our overlay layer is gone and you can choose to re-apply it to the object layer that has the cracked tex, or you can leave it normal.  You might be asking what the difference is… if you set the layer to Overlay, any textures or details on the layer below it will be blended with the top layer.  This is what you HAVE to do when applying the cracks to a photo.  But in this example, the grey text layer is completely solid so we don’t need to re-apply the overlay.

Step 5: Now combine the two text object layers and you are now ready to add some highlights to the text!

Step 6: Ok first off, we’ll add some dark gradient to our text.. so go ahead and do a copy/paste of the text and darken it up, and make a gradient from it.  If you don’t know how to do this, I recommment you read this tutorial, which covers the procedure of creating gradient text in detail.

Dark layer:

Step 7: Now you can go with that or add some dark shadows to the bottom of the text… this is a bit different to how I normally do this, so lets go a bit in detail on how it’s done.  First, create a duplicate of the text and decrease it’s brightness 100% so that the text is solid black:

Now go ahead and apply a Gaussian Blur effect to the text… a pixel radius of about 4 should do it:

Use the Interactive Transparency Tool to add the gradient fade to the blurred shadow:

And finally, open up the objet’s properties window and adjust the opacity to tone it down a bit:

And there you have it!

Step 7: In this next step, I’ll show you how to brush on some effects to your text and have it only apply to the text instead of the entire canvas.  In this case, we’ll add a splatter of blood to the text.  You start off by combining all the text layers together in to a single object layer, then hit Ctrl-M to add a mask around the next like this:

Now grab a blood splatter brush, choose your color and opacity and add a bit of good ol’ violence to your text!

PRO TIP: You can download a blood splatter nib set from my blog site at www.danrichard.com!

Add a bit more to the other corner:

Step 8: Now just add a little reflection (You can read my tutorial on reflections here) and you are done!

Now those of you may be wondering why I said it could be applied to text, objects, photos etc… when so far all I did was text.  Well, because if you experiment with various layer styles, you can use this exact same technique to add cracks and other textures to anything you want!  Here are some additional images I applied the exact same trick to, along with what they looked like before:


That’s it for this one, thanks for reading and I hope you enjoyed!  Remember to post a comment or use the buttons below to share.

Thanks,
Dan

It's Official, The P2L Staff are EVIL!

It's Official, The P2L Staff are EVIL!

Yes folks, it's now proven that I am surrounded by hardworking, YET EVIL, staff and they are all devil spawn. Why you ask? Well, this morning I go through the usual morning rush to get everyone fed, tidy up and then bring Corina to school. The last thing on my mind is that it's my birthday today… JUST before I leave, I decide to pop on to P2L to look in on things and I'm greeted by this screen:

I have an absolute heart attack on the spot, and no matter where I try to go on P2L, I get this hacked screen. And of course, I have to leave and have zero time to investigate. I bring Corina to school almost in tears because I'm ready to kill someone and I'm LIVID at the thought that I have to drive around before I can get this fixed. I drop off my daughter (she gives me birthday kisses) and I FLY home and get in front of the PC. I turn on the monitor and I notice not a single MSN message, no email, nothing about the site getting hacked. Now, I've had time to wake up at this point and the ol' brain has started to kick in, so I immediately have one thought… NICK DID THIS! At this point I know the staff are no good, so I PM a couple of people on MSN and sure enough the site is working. I hop on the the FTOP and find 2 files that were modified last night. I open them up, and sure enough there a comment section saying "DAN'S BIRTHDAY HAX".

YOU GUYS ARE PURE EVIL!!!!

Well thanks for the heart attack, additional grey hair and loss thereof and the heavy drinking habit, you did well! Happy birthday indeed… God help you guys when YOUR birthdays roll around!

Thanks for the laugh guys… well, at least now I'm laughing.

Dan

'Show the P2L Love' Contest Winners!

'Show the P2L Love' Contest Winners!

It's my pleasure to announce the official winners of the Show the P2L Love contest! First off, it was a real blast seeing your entries… some were really nice and others were hilarious, but a ton weren't photos. Tsk Tsk some folks didn't read those rules! I picked out my absolute favorite as the first prize winner, then randomly drew the name from my remaining 10 favorites. So without further rambling, here are our winners:

FIRST PRIZE

This beautiful entry was submitted by Dezept1p, and features a romantic P2L lovin moment taken on the beach at the edge of the Baltic Sea. Pass the Corona!

SECOND PRIZE

They say the way to a man's heart is through his stomach, and Ben Lind hit the nail on the head with his delicious assortment of carefully arranged M&Ms! Now if Ben would be so kind as to send me those M&Ms for ingestion inspection, it would be greatly appreciated.

HONORABLE MENTIONS

We had some great entries from all over the place, and here are some other examples of the great entries we had:

We had folks dismantling their computer equipment:

We had pimpin' P2L DJ's complete with comb and tinfoil teeth bling LOL!

And we had people destroying local foliage:

So that's it gang! Winners will be contacted via email in just a bit to confirm details and congratulations on winning! I'd also like to thank everyone that participated in this contest and I advise everyone to keep an eye open for our next contest, coming VERY soon. I want to give everyone a chance to take home some loot, so we've got LOTS more coming!

Until next time,
Dan

How to create a diagonal opening blinds transition effect for images in Flash

How to create a diagonal opening blinds transition effect for images in Flash

Introduction

Welcome to my first tutorial in quite awhile!  Today I’m going to crack open something I haven’t used in a VERY long time, and that’s Flash.  For those of you unfamiliar with my design background, I was a very heavy Flash designer and used to be quite specialized in ActionScript and coding massive desktop emulation style web layouts entirely in Flash.  I’ve also put together many presentations and movies with Flash, and sometimes it’s fun to crack it open for a few minutes and mess around before I’m reminded how tedious working in Flash is and I close it for another year or two.  In fact, when I stopped developing in Flash as a primary focus, it was back when Flash 5 was just being launched, so that gives you an idea of how long it’s been.

But with that said, it’s very much like riding a bike… you still remember how to do it even if you haven’t touched it for years.  I have to admit the advanced ActionScript I once lived and breathed like a religion has complete slipped my memory beyond the Geturl and Stop commands, so luckily today I am going with a strictly animation style tutorial.

The first thing I want to mention is that my programmers love to giggle at my complete ignorance when it comes to PHP and other joys of website coding, and I’m fairly sure they do it on purpose to give me cryptic and code filled answers when I ask why something is broken and see if I pretend to understand.  They might as well be clicking it out in Dolphin speak, as I’d have equal chances of understanding anyhow.  So you can imagine the satisfaction when one of my friendly programmers asked if I still did Flash and if I knew how to re-create an effect he had seen on another website.  It was a fairly simple transition effect and I knew instantly how to go about it. which I started hammering out in MSN.  This was met with a confused mutter by the programmer who was clearly getting a taste of his own medicine.  So without much nose rubbing, I quickly made him an example and thought I’d share this with everyone in the form of a tutorial.

What we are going to do is create an animated transition effect where it looks like a diagonal row of blinds is opening to reveal an image below.  This can be used when loading a site banner, for buttons or as a photo gallery transition effect.  Granted I’m going to be a tad sloppy about this, but you can create some very clean versions of this by using more masks to control the overflowing lines and such.  I’ll also show you a couple of variants on this effect by adding a fade out as the blinds open.

Tools

For this tutorial, I will be using Adobe Flash CS3, but this technique can be used in any version of Flash, it’s all the same.

I would also like to give a shout-out to my friends at GoMedia.com, which is where I got the wallpaper I am using for this tutorial.  Check out their stuff, they’ve got some WICKED artwork in their portfolio and some gorgeous Vector Packs, Texture Packs and more you can purchase, as well as some free goodies.

We’ll also have some project files for this tutorial, which are demo packs that include the .FLA, .SWF, and .HTML files needed to view each step.  To use these packs, simply unzip the contents to a temp folder and you can either open the HTML file or the SWF file directly.  Here are the files, which I will repeat when they become relevant to the tutorial:

File Download: Project Files 1
File Download: Project Files 2

Experience Required:
Since this is my first Flash tutorial, I’m going to make it very basic and assume you can barely navigate Flash.  Each step and each click will be documented, but any future tutorials will assume you know how to perform simple tasks like creating new layers, converting items, working with frame functions etc.

All set?  Just strike a pose, there’s nothing to it, VOGUE!

Read More Read More