Create 3D Style Text with a Wireframe Effect in Corel Photopaint
You may recall that a couple of months ago, I posted a fairly simple tutorial on how to create pseudo 3D text in Corel Photopaint, which was an easy effect to create, and could achieve a fairly high degree of realism in terms of lighting and shadows. Well today I would like to take that tutorial one step further and create a similar effect, but show you how to add a lined wire-frame to the text for that added 3D punch. This looks great on squared text types, but with the right kind of tweaking, you could pull this off with anything. In fact, the final effect almost resembles pixel art:

We’ll also work in some sexy gradients to spice up the lighting and all that good stuff too! I’ve included lots of screenshots because this can be a bit confusing due to the multiple objects we’ll be piling on at times. So roll up your sleeves and let’s get to it!
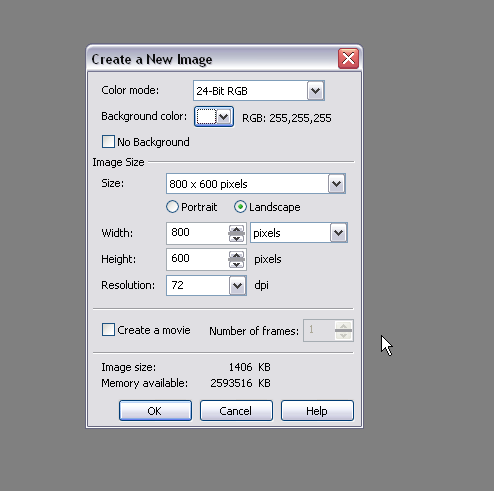
Step 1: As usual, let’s start off with a clean canvas… in this case, I’ll go with an 800×600 layout with a white background.
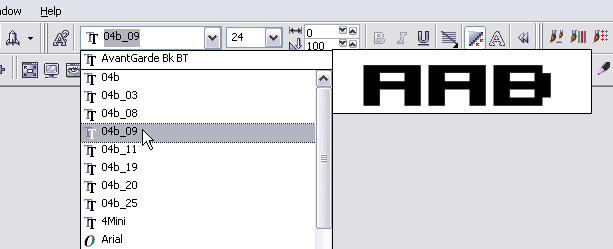
Step 2: Pick a font that has squared off edges to it, like a bitmap or pixel style font. Any style of those font classes will always turn out looking great. Grab yourself a color (I chose good ol’ green) and type something out.

Please continue to the next page.
6 thoughts on “Create 3D Style Text with a Wireframe Effect in Corel Photopaint”
Nice work Dan! Looks like a pretty well explained tutorial for Corel Users =)
Thanks bud 🙂 Nice thing about these Photopaint tutorials is that they are VERY easy to translate to Photoshop terms. Most of the options are the exact same thing.
Dan
hey! your tutorials rocks! I totally feel it! please work hard and hope for the best!
MORE POWER TO DANRICHARD.COM!!!!!!!!!!!!!!!!!!!!
=)
Awesome column , I’m going to spend more time learning about this topic
Many ways to do photo manipulation, now many online services that provide services for photo manipulation, but I prefer to use Photoshop to perform manipulation. Photoshop tutorials are very interesting to learn. With Photoshop we can create to generate a variety of photo look more attractive.